
This tutorial shows different methods and tools to get the Night Light feature in Ubuntu and other Linux distributions.
You probably already know what night light feature is. The computer or mobile screen could be stressful to the eyes, specially at night.
This is why almost all major operating systems like Linux, Windows, macOS, iOS, Android etc provide this nightlight or night sift feature. Basically, it is a display-based setting that cuts down on blue light exposure at night and provides a warm yellow light that’s easier on your eyes.
The night light turns on automatically after sunset in your location or at a predefined time. When it is turned on, the screen goes yellow. You should be able to change the yellowness of the screen most of the time.
Sounds good? Let me show how to activate night light feature in Linux.
Activate night light on Ubuntu and other Linux distributions using GNOME
Night light (also termed as night shift) is no more a luxury feature. It is considered essential these days and most operating systems provide it as a built-in feature.
Linux is no different. GNOME and KDE, two major desktop environments, have added the night light feature in the settings.
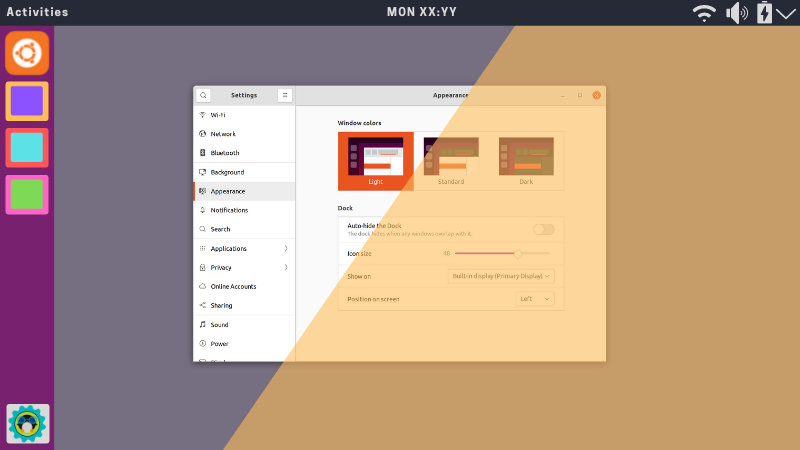
On Ubuntu or any other distribution using GNOME desktop, search for night light in the menu. It will show display because night light feature is under the display setting.

In the display setting, go to Night Light tab and toggle the Night Light switch.
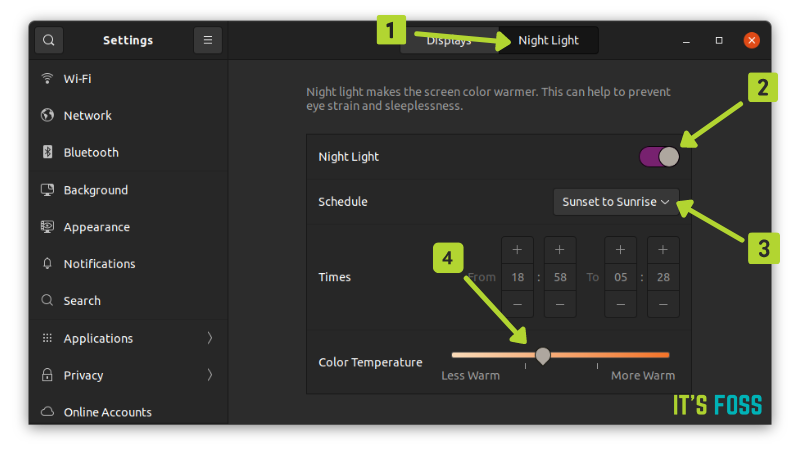
You can decrease or increase the color temperature (yellowness of the screen). Less warm means less yellowing of screen, and more warm means more yellowing.
By default, it will be set to automatically start from sunset to sunrise in your location. So please ensure that you have set the correct time and time zone on your system.
Enabling/disabling Night Light on a need basis
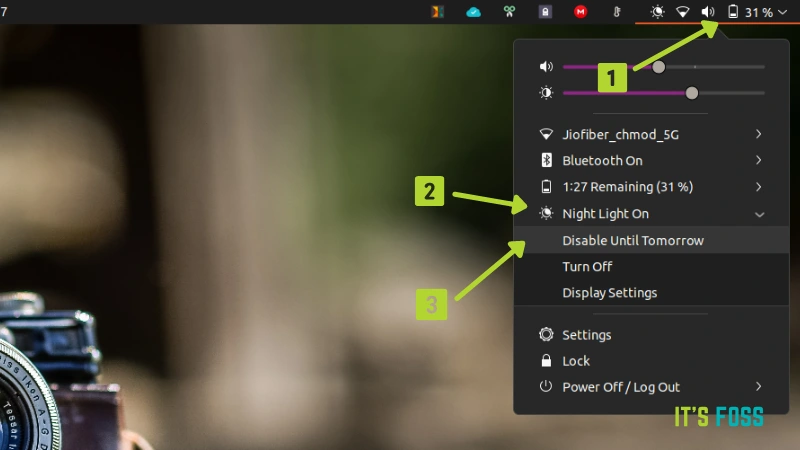
Watching a movie or web series at night? Having your screen yellowed in such a case is not a good idea. You can disable and re-enable Night Light by toggling the same button that you saw above.
At least in Ubuntu, things are a lot better because it allows applet indicators on the top panel. This means you can easily access the Night Light settings here. If you want to temporarily disable it, choose ‘Disable until tomorrow’ option.
Similarly, KDE also has Night Light feature built in. You just have to search for it.
But, not all desktop environments have built-in Night Light feature. This is why you might need to use tools like Redshift or Flux.
Alternate method: Use Redshift to get Night Light in Linux
Redshift is a simple app that provides the night light feature on Linux systems.
The plus point of using Redshift is that you just need to install it. No configuration is needed here. It automatically determines your location and sets up night shift at sunset.
The only negative point of Redshift is that you cannot configure it to set its saturation level.
Redshift is available in Ubuntu repository. Just use the command below to install it:
sudo apt-get install redshift-gtk
To remove Reshift, use the command below:
sudo apt-get remove redshift-gtkAlternate Method 2: Use f.lux for night light feature in Linux (discontinued)
Deprecated tool
Flux won’t work on most modern systems and the developer has no plans to fix it. In other words, Flux has been discontinued and you should not be using it.
If you are using Ubuntu or any other Linux distribution based on Ubuntu such as Linux Mint, elementary OS, Linux Lite etc, you are in luck. There is GUI based indicator applet that you can use and configure f.lux easily. You can use this unofficial but reliable PPA to install f.lux applet indicator.
Open a terminal and use the following commands:
sudo add-apt-repository ppa:nathan-renniewaldock/flux
sudo apt-get update
sudo apt-get install fluxgui
Configuring f.lux
How to configure f.lux
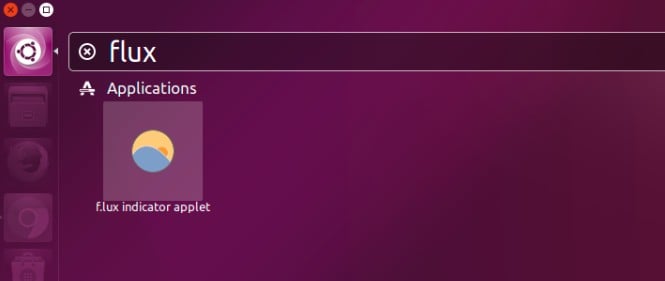
Using f.lux is really easy. Once installed, open f.lux. If you are using Ubuntu Unity, you can search for it in the Dash:
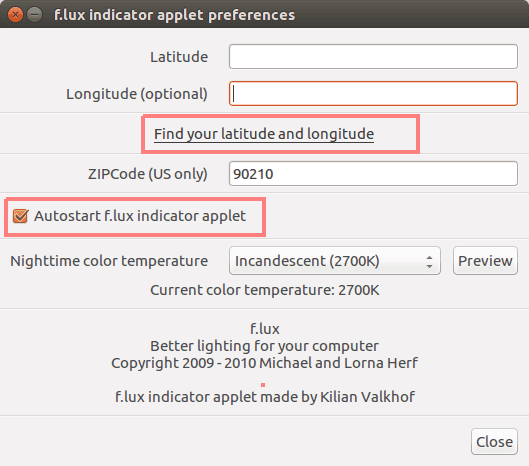
When you start f.lux, you’ll see a window like the one below. You need to enter the latitude and longitude of your present location. Don’t worry if you do not know that. You are not supposed to know that by heart anyways.
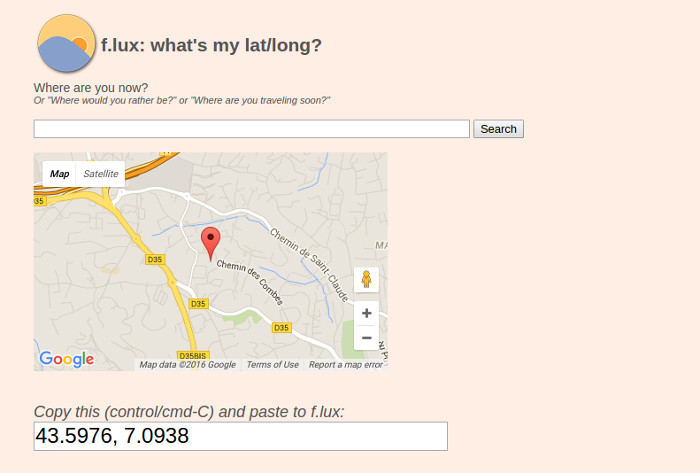
Just click on the Find your latitude and longitude link and it will open web browser window. Allow location tracking, if it asks for that.
If you are in the US, you can use your zip code as well.
You’ll get the longitude and latitude data in the web browser. Copy it:
When you have the geographical data, enter it in the Preference window. Also, check the auto start part so that you won’t have to manually start it each time after you boot in to Linux.

There are various settings for the color temperature. In my opinion, Halogen is sufficient but you can preview other temperature settings as well and see what rocks your boat.
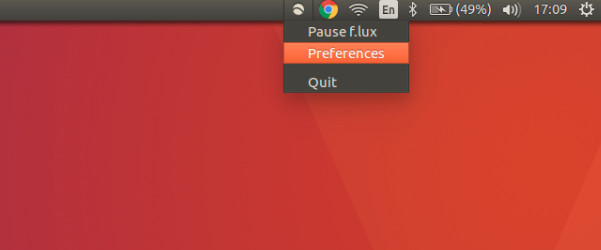
As an indicator applet, f.lux configuration is always accessible from the top panel in Unity. If you want to get the normal display, you can simply pause f.lux. Similarly, you can change the preference whenever you want.
How to remove f.lux
If you did not like it, use the commands below to remove f.lux from your system:
sudo apt-get remove fluxguisudo add-apt-repository -r ppa:nathan-renniewaldock/fluxHow cool is it on your eyes?
I am using Night Shift on my phone and my laptop. I say it does help in reducing strain on the eyes. It is definitely one of the essential productivity tools for Linux.
In addition to this, you can also use SafeEyes that helps you avoid computer eye strain.
How about you? Have you tried using f.lux? Does it help to cool your eyes and sleep better?
