
There are several ways to install Linux.
- You can clean everything from your system and install Linux.
- You can dual boot Linux with Windows and choose one of the operating systems at the boot time.
- You can even install Linux within Windows from Microsoft Store (though this only provides you with the command line version of Linux).
But if you want to use Linux without making any changes to your Windows system, you can go the virtual machine route.
Basically, you install and use Linux like any regular Windows application. When you just want to try Linux for limited use, virtual machines provide the most comfortable option.
In this tutorial, I’ll show you how to install Linux inside Windows using VirtualBox.
Installing Linux inside Windows using VirtualBox
VirtualBox is free and open source virtualization software from Oracle. It enables you to install other operating systems in virtual machines. It is recommended that your system should have at least 4GB of RAM to get decent performance from the virtual operating system.
Requirements
- Good internet connection to download software and Linux ISO. (You can also use some other computer with an internet connection to download these files.)
- Windows system with at least 12 GB of free space.
- Windows system with 4GB of RAM. (It can work with less RAM as well, but your system will start to lag while using Linux in the virtual machine.)
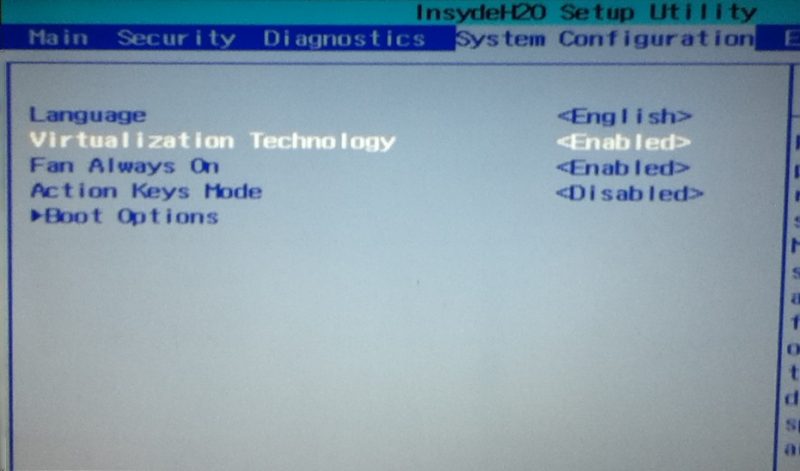
- Make sure to enable virtualization in the BIOS (some system need it)
I am installing Ubuntu 17.10 in this tutorial, but the same steps apply to any other Linux distribution. If you prefer videos, you can watch the one below from our YouTube channel:
Step 1: Download and install VirtualBox
Go to the website of Oracle VirtualBox and get the latest stable version from here:
Installing VirtualBox is not rocket science. Just double-click on the downloaded .exe file and follow the instructions on the screen. It is like installing any regular software on Windows.
Step 2: Download the Linux ISO
Next, you need to download the ISO file of the Linux distribution. You can get this image from the official website of the Linux distribution you are trying to use.
I am using Ubuntu in this example, and you can download ISO images for Ubuntu from the link below:
Step 3: Install Linux using VirtualBox
You have installed VirtualBox and you have downloaded the ISO for Linux. You are now set to install Linux in VirtualBox.
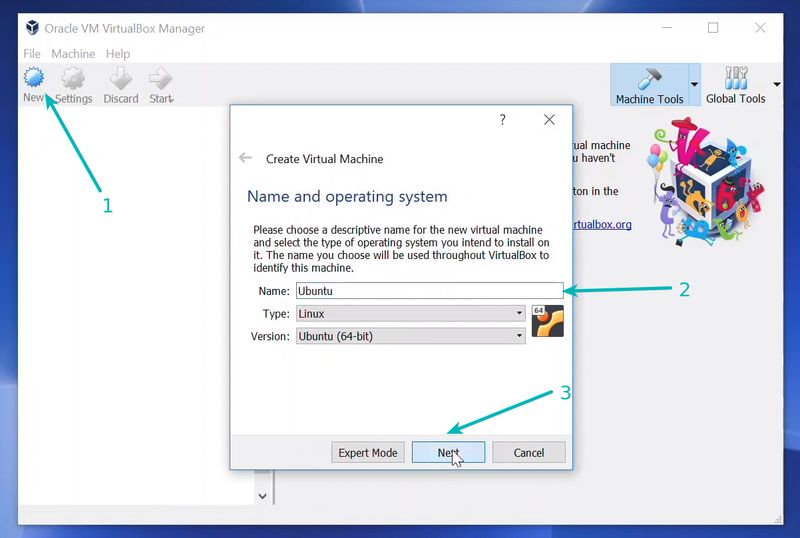
Start VirtualBox, and click on the New symbol. Give the virtual OS a relevant name.
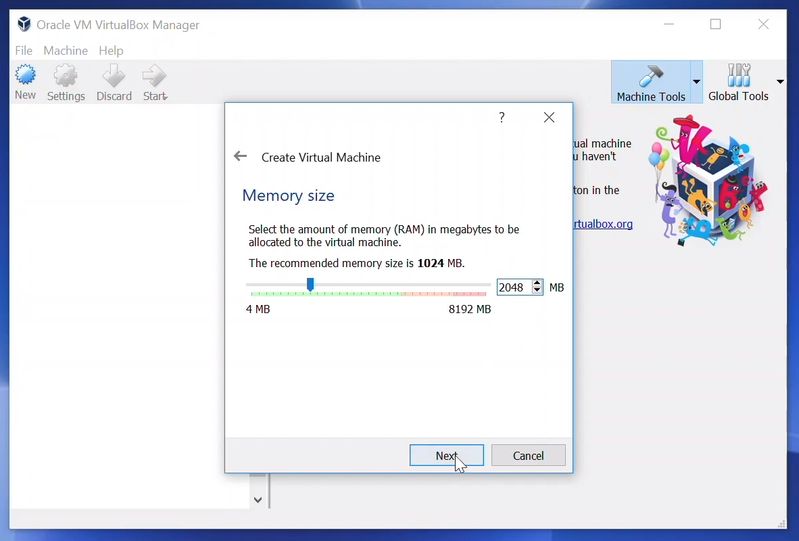
Allocate RAM to the virtual OS. My system has 8GB of RAM and I decided to allocate 2GB of it. You can use more RAM if your system has enough extra.
Create a virtual disk. This serves as the hard disk of the virtual Linux system. It is where the virtual system will store its files.
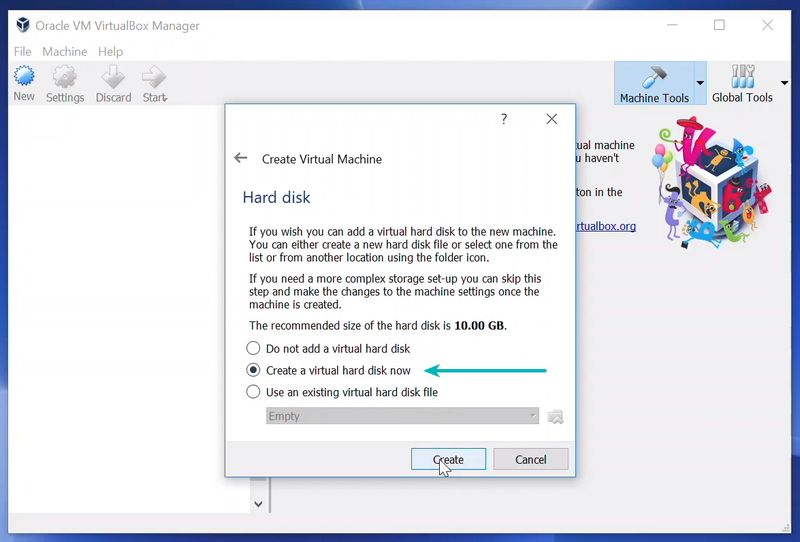
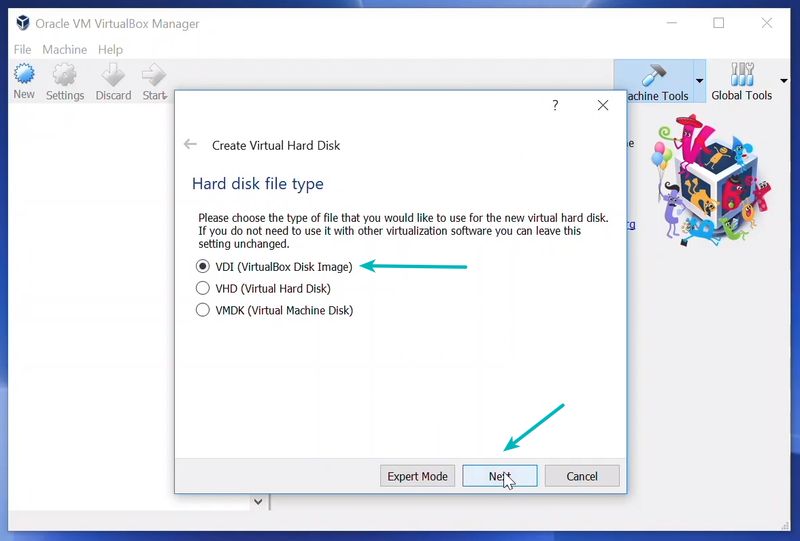
I recommend using the VDI file type here.
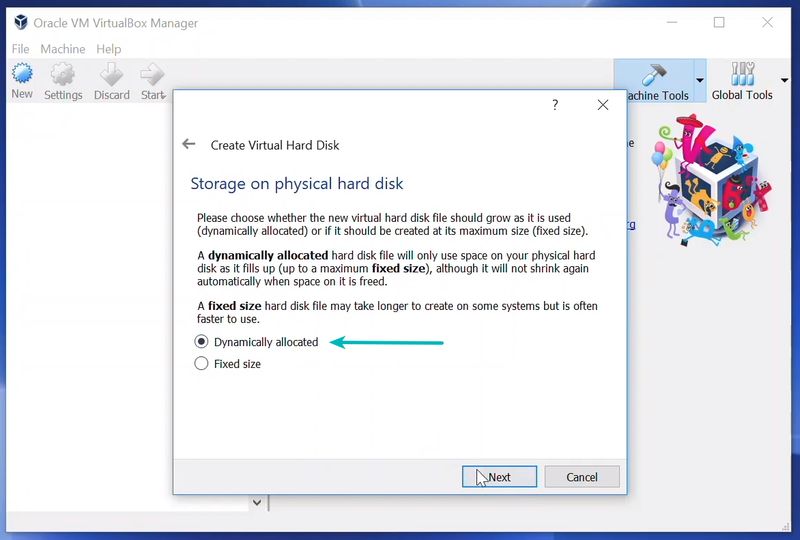
You can choose either the “Dynamically allocated” or the “Fixed size” option for creating the virtual hard disk.
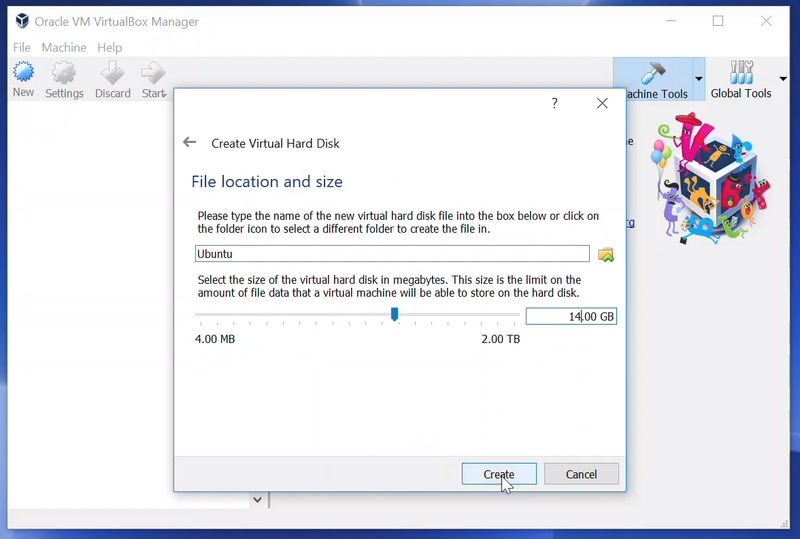
The recommended size is 10 GB. However, I suggest giving it more space if possible. 15-20 GB is preferable.
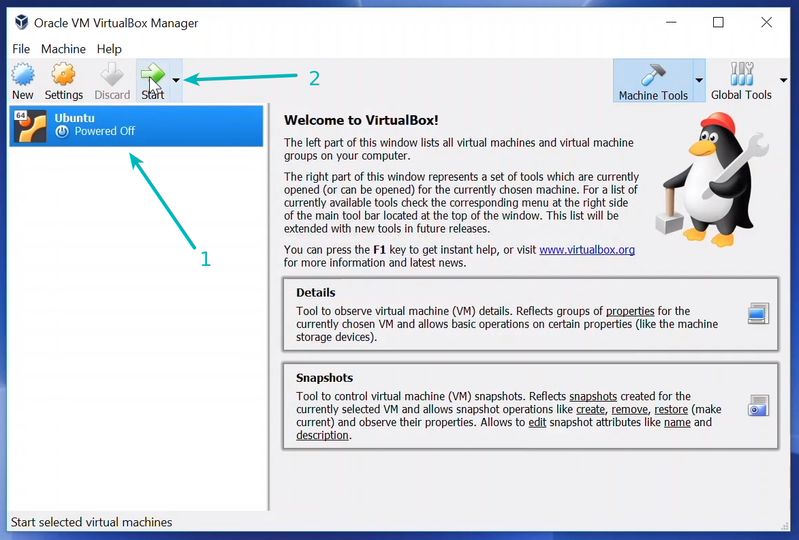
Once everything is in place, it’s time to boot that ISO and install Linux as a virtual operating system.
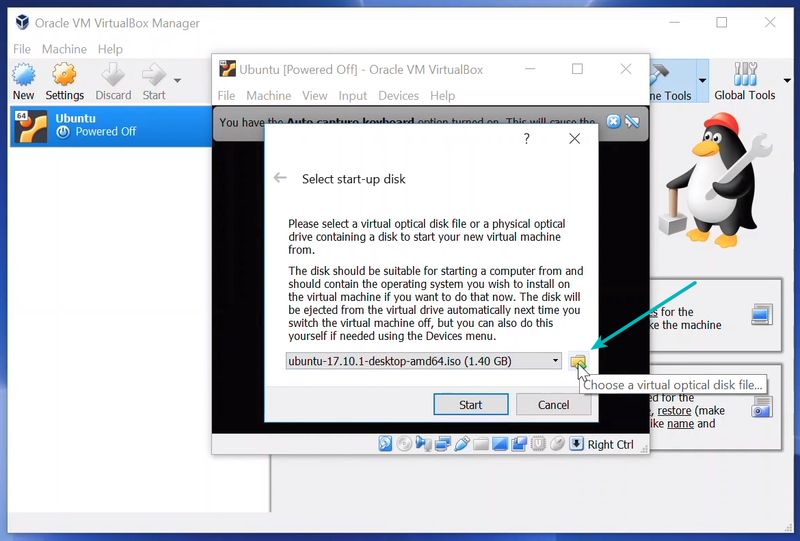
If VirtualBox doesn’t detect the Linux ISO, browse to its location by clicking the folder icon as shown in the picture below:
Soon you’ll find yourself inside Linux. You should be presented with the option to install it.
Things from here are Ubuntu-specific. Other Linux distributions may have slightly different looking steps, but it won’t be complicated at all.
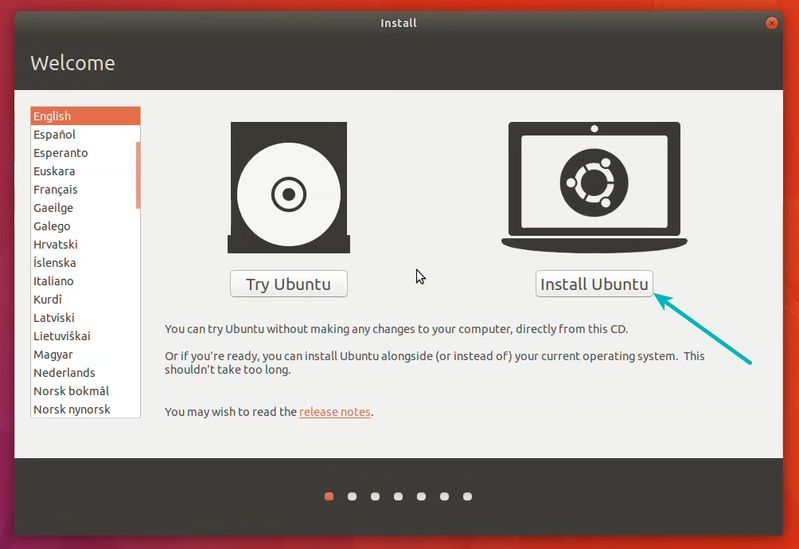
You can skip to Continue.
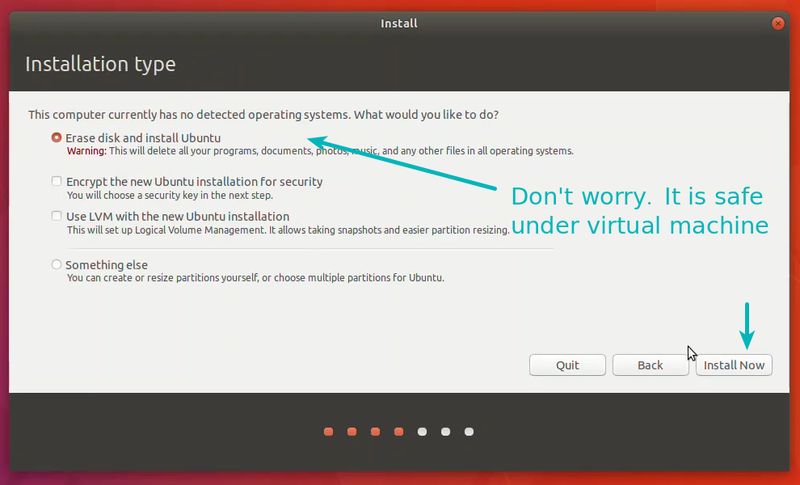
Select ‘Erase disk and install Ubuntu’. Don’t worry. It won’t delete anything on your Windows operating system. You are using the virtual disk space of 15-20GB that we created in previous steps. It won’t impact the real operating system.
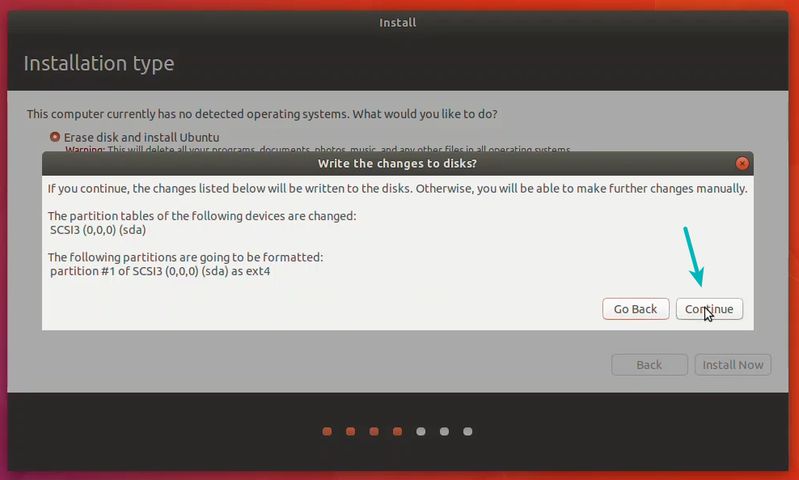
Just click on Continue.
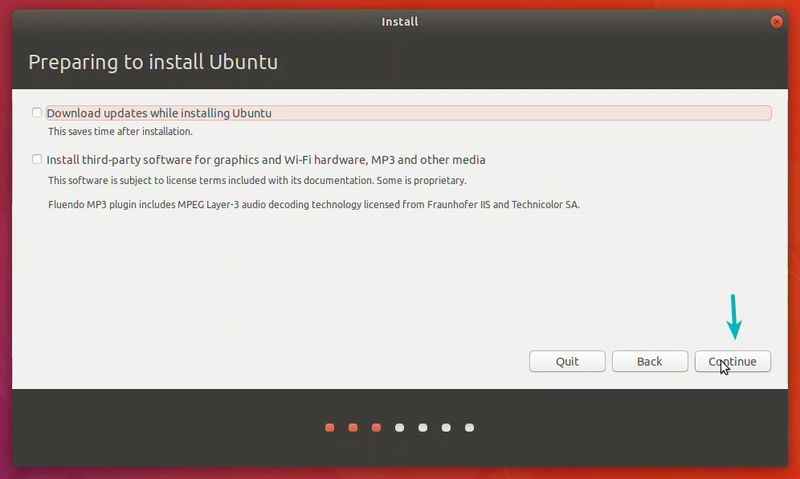
Things are pretty straightforward from here.
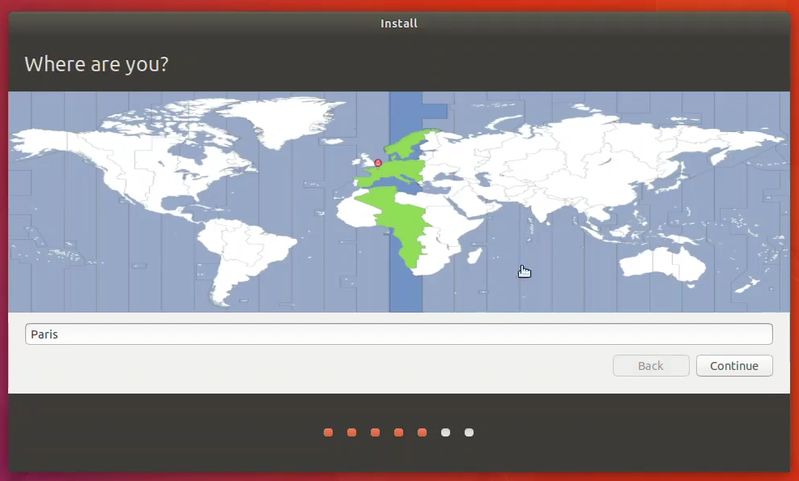
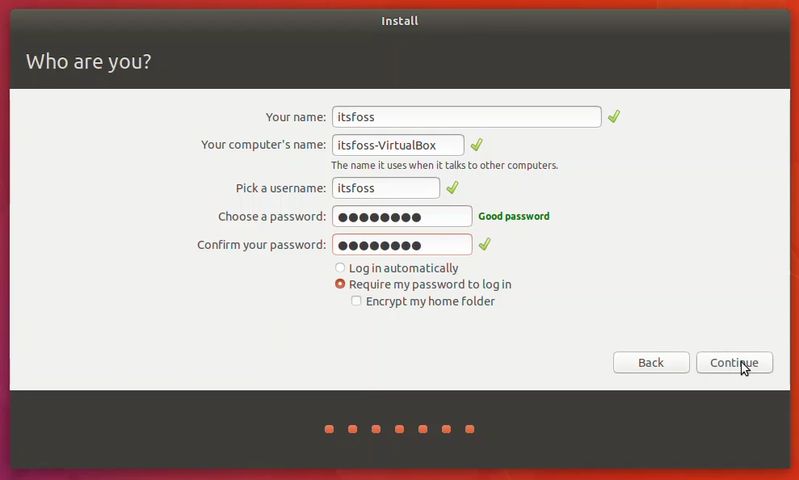
Self explanatory.

Try to choose a password that you can remember. You can also reset the password in Ubuntu if you forget it.
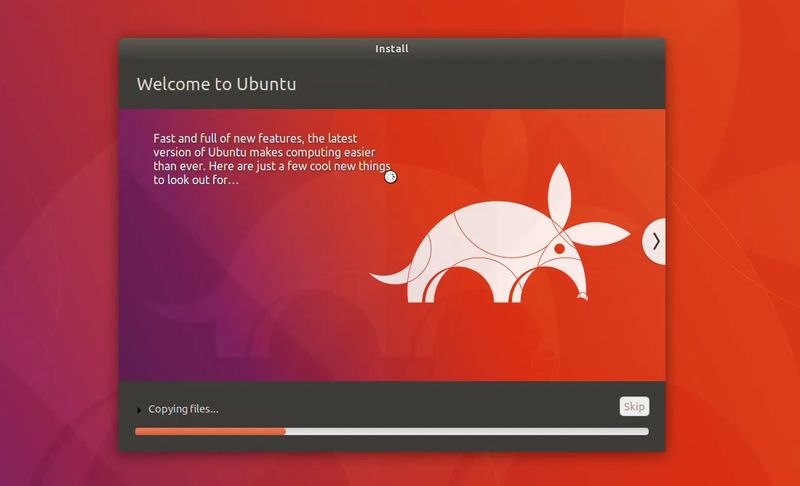
You are almost done. It may take 10-15 minutes to complete the installation.
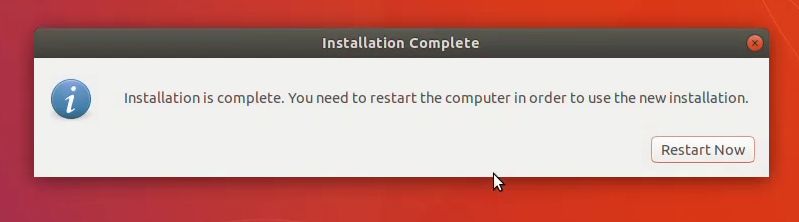
Once the installation finishes, restart the virtual system.
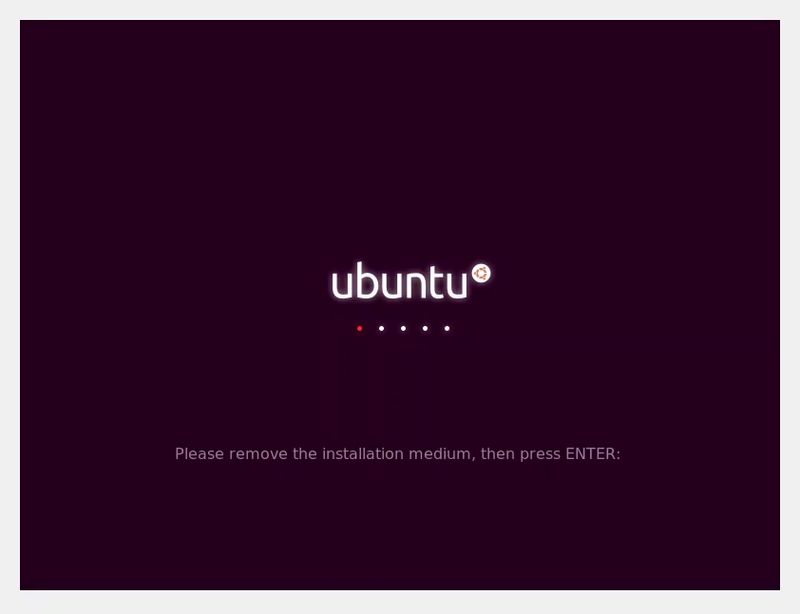
If it gets stuck on the screen below, you may close the VirtualBox.
And that’s all. From now on, just click on the installed Linux virtual machine. You’ll be able to use it directly. The installation is a one time only process. You can even delete the Linux ISO that you downloaded earlier.
I strongly recommend using VirtualBox Guest Additions on Ubuntu for it provides better compatibility and you would be able to use copy-paste and drag-drop between Linux and Windows.
Troubleshooting: AMD-V is disabled in the BIOS
If you face this error while using the virtual machine:
Not in a hypervisor partition (HVP=0) (VERR_NEM_NOT_AVAILABLE).
AMD-V is disabled in the BIOS (or by the host OS) (VERR_SVM_DISABLED).
Result Code:
E_FAIL (0x80004005)
Component:
ConsoleWrap
Interface:
IConsole {872da645-4a9b-1727-bee2-5585105b9eed}
This means that virtualization is blocked on your system. You’ll have to activate it in your BIOS settings first.
Reboot your system and as soon as it powers up, press F2/F10/F12 to access BIOS settings. You have to look for the virtualization option in the BIOS and enable it.
Any questions?
That’s all you need to do to install Linux in VirtualBox on Windows.
If you have any doubts, or if you encounter any issues, please feel free to ask your questions in the comment box below.
