
Brief: Ubuntu provides an easy way to find and install proprietary drivers. This quick tutorial shows you how to install additional drivers in Ubuntu including Nvidia proprietary drivers.
How do you install drivers in Ubuntu? The simple answer is that Ubuntu itself identifies and installs drivers on your system. Unlike older versions of Windows, you don’ have to manually search for and install drivers here.
But there is a catch. Some hardware components have several drivers available: open source ones and the proprietary ones.
By default, Ubuntu installs the open source drivers and in some cases, that causes problems in your Ubuntu install.
You might face some issues with the wireless or the graphics card. Sometimes it’s because the open source version provided by the Linux distribution doesn’t work as good as the proprietary drivers provided by the hardware manufacturers.
The good thing is that Ubuntu is aware of these issues and this is why it provides an easy way to install additional proprietary drivers.
You may use these additional drivers to get better performance on your system. If you find them not working, you can revert
In this tutorial, you’ll learn how to install additional drivers on Ubuntu. I’ll also show you how to install Nvidia proprietary drivers on Ubuntu.
Installing additional drivers in Ubuntu
Since a few versions now, Ubuntu doesn’t have Additional Drivers listed as a separate application. Instead, it now resides in the ‘Software & Updates’ app. From here, you can install drivers which are not installed by default during installation.
Let me show the exact steps for installing additional drivers.
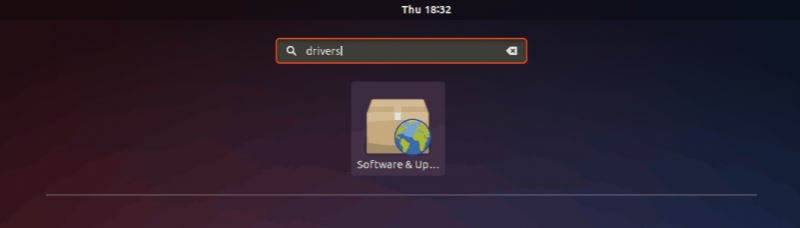
Step 1: Go to Software Settings
Go to the menu by pressing the Windows key. In the search bar, type ‘drivers’. Click on ‘Software & Updates’ in the results.
Step 2: Check available additional drivers
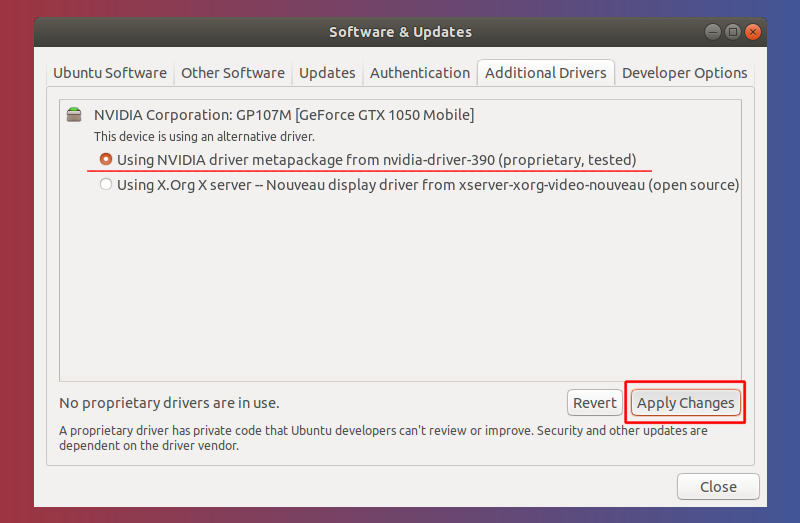
Open the ‘Additional Drivers’ tab. Here you will be able to see all the devices you can install drivers for.
As shown in the image below, in case of other drivers like wireless drivers, you will get the option to either use the driver or to not use the device at all.
To use the install the drivers, select it and click on Apply Changes.

Step 3: Install the additional drivers
After the installation is complete, you will get a restart option. Click on it to restart your system and finish driver installation. The driver will be in use after the reboot.
If you ever want to go back to using the open source driver or disabling the device, you can open ‘Additional Drivers’ and select the corresponding option for that.
Note
If you want to use the default driver instead of the proprietary one that you just installed, just select the option “Do not use the device” under that.
You can use lspci Linux command to check which graphics card do you have in your system.
Install Nvidia Proprietary Drivers in Ubuntu
Let’s see how to use Nvidia proprietary drivers on Ubuntu.
The question is, why would you do that in the first place? This is because the free and open source ‘nouveau’ driver may not properly support the graphics card’s functionality.
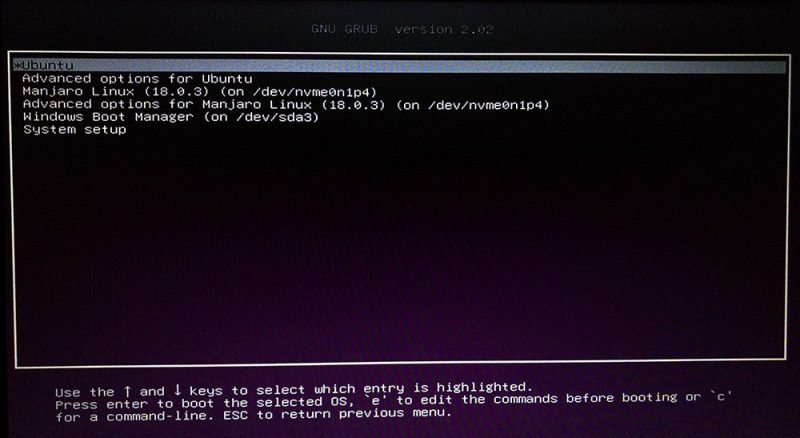
In a few cases, the system would not boot at all and gets stuck at
Fixing boot problem with Nvidia Nouveau
To work around this issue, you have to disable the ‘nouveau’ driver. You can do this using
On the grub screen, press ‘e’ to edit the command line.
Navigate to the line starting with ‘
modprobe.blacklist=nouveau
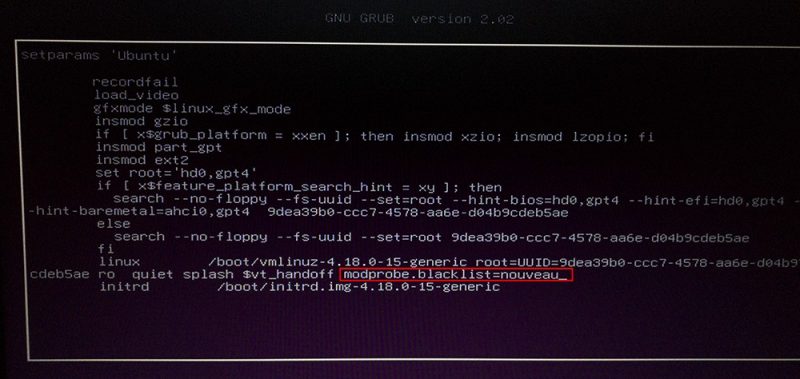
After this, press F10 to boot and follow the rest of the simple steps. If your system still fails to boot (most probably systems with 900 series or 1000 series GPUs), you may need to add some more kernel parameters. Check this link for more information.
In the previous section, you have already learned how to see the additional drivers available for your system.
In this particular case, you can see the NVIDIA discrete graphics card has two driver options available. The open-source one and the proprietary one.
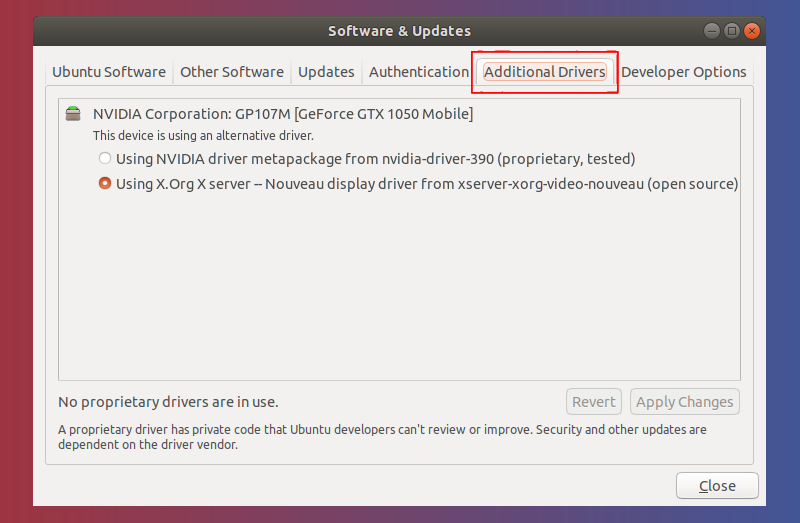
Click ‘Using NVIDIA driver
After installation is complete, you will get a restart button. Click on it to restart your PC and finish driver installation.
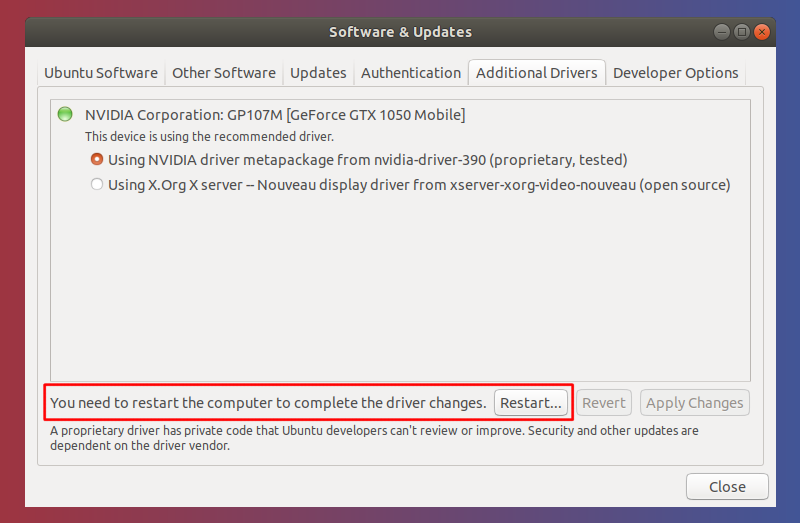
That’s it. You restart your PC and you should see Nvidia Graphics in action.
I hope this quick tutorial helped you with Nvidia drivers and additional drivers in Ubuntu. If you have questions or suggestions, please let us know.
